This topic describes the following:
- Complete the following pre-requisite equipment, assembly and peripheral tasks.
- Assemble and connect the following components. Please visit the Cal-VIS Frequently Asked Questions page
for system requirements:
- PC-based Computer (The user must have administrative rights on the computer in order to install
the Cal-VIS software.)
- Printer
- DAD device
- Fujitsu palm vein scanner ("BAR BAK" kit with FAT13FPS01 sensor)
- Bar code scanner
- Smog Check Station Wall License
- Smog Check Inspector Wall License
- Connect the computer to the Internet. Cable, DSL, 4G or faster are recommended connection speeds. Internet
connection must be continuous.
- Complete applicable tasks on the Download and Registration Website.
- Navigate to the Cal-VIS Download and Registration site that was provided to you. The site is also available on
BAR's Web site under the Cal-VIS link.
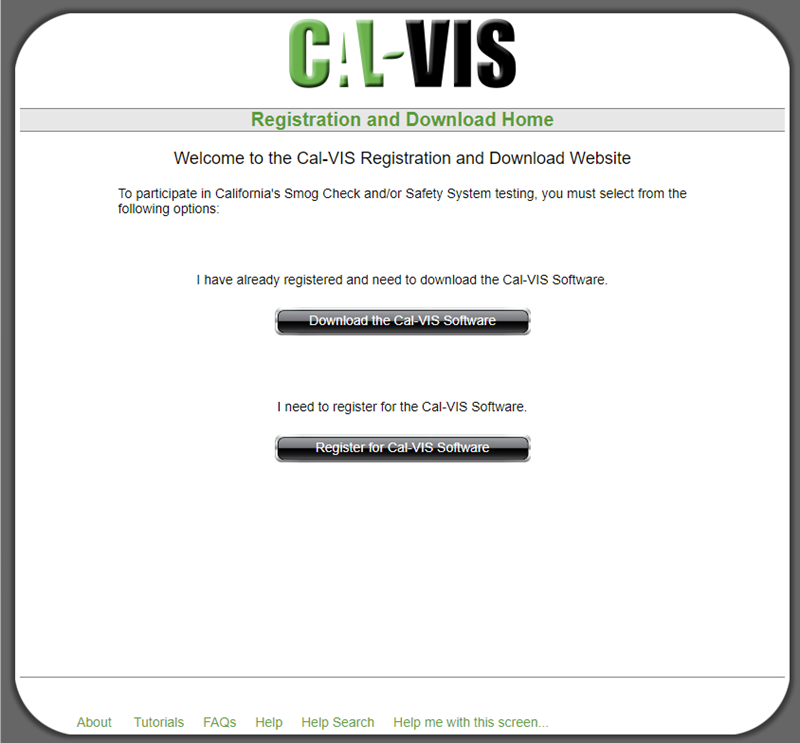
- Respond accordingly to the following options:
- Proceed to Configuring Cal-VIS Software upon completion of task(s) on the Download Website.
- Complete applicable tasks on the Registration Website.
- Navigate to the Cal-VIS Registration site that was provided to you.
- Respond accordingly to the following options:
Note that a valid and unique E-mail address is required to register as well as receive user password information for the Cal-VIS.
Back to Top
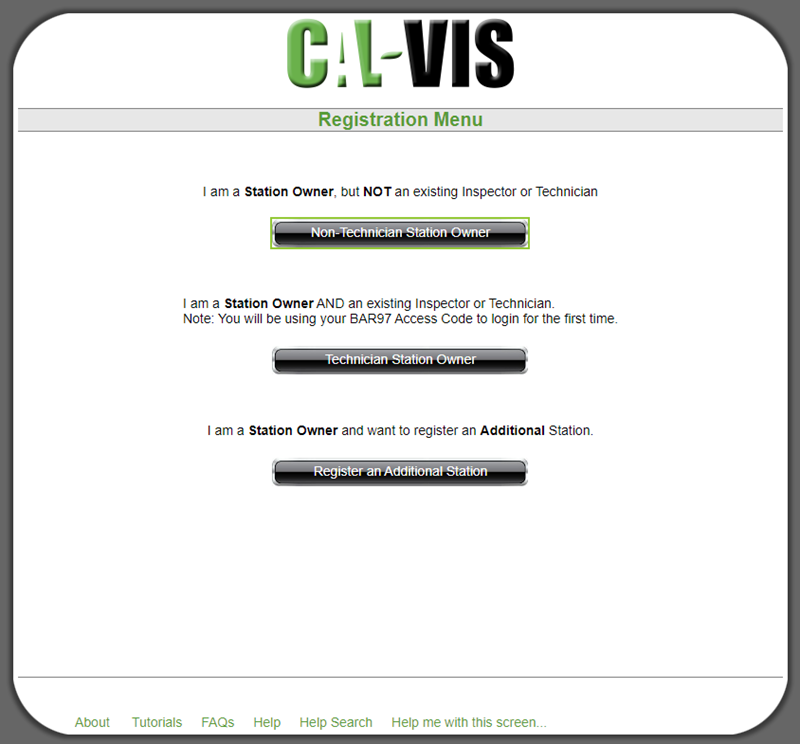
Registering as a Non-Technician Station Owner
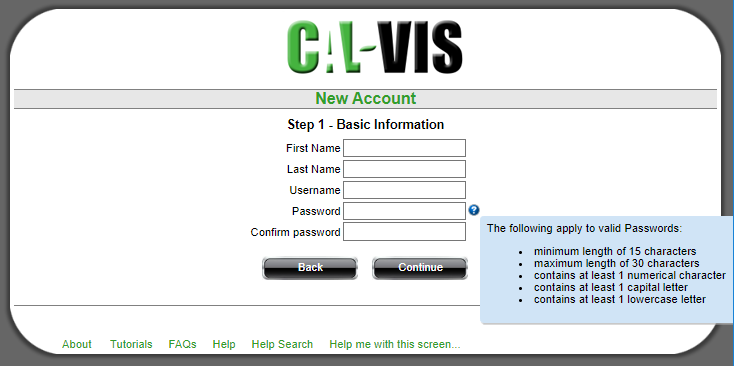
- Step 1 - Basic Information for the New Account: Enter the requested account information.
When determining a password, slide the mouse pointer over the question mark (?) to the right of the
Password field to display valid password parameters:
Click Continue to proceed.
- Step 2 - Email Entry and Verification: Enter a valid address and then click the Send Code button to request
an email from BAR containing an Email verification code.
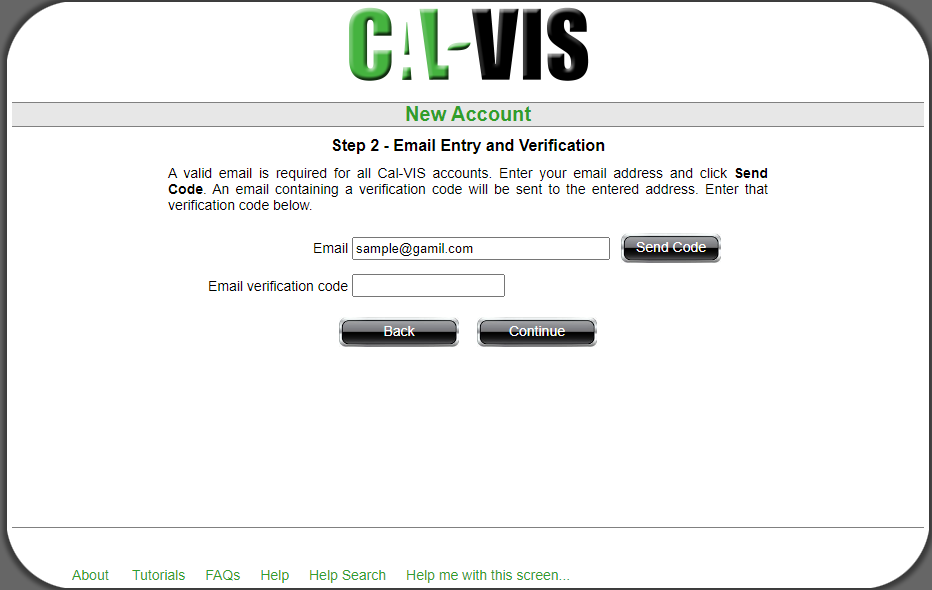
Upon receipt of the email, enter the Email verification code and then click Continue to proceed.

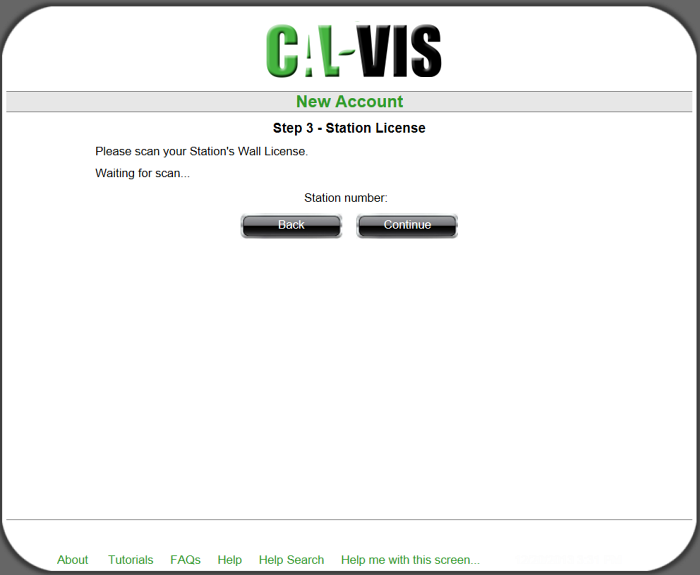
- Step 3 - Station License: Scan the Station Wall License bar code. Click Continue to proceed.
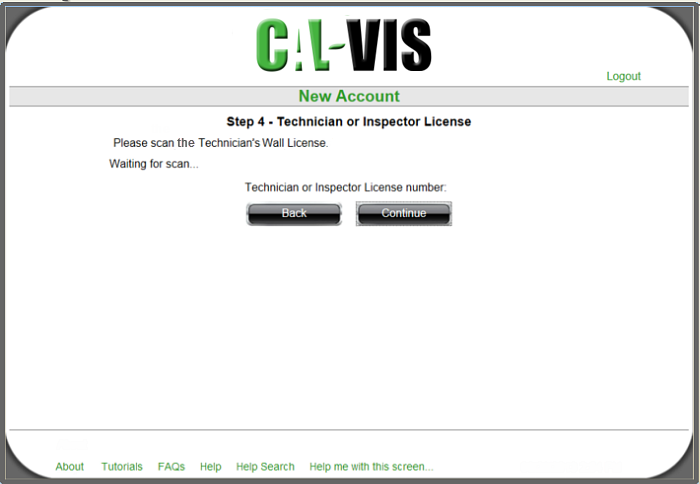
- Step 4 - Scan Technician or Inspector License: Scan the Technician's Wall license bar code.
Click Continue to proceed.
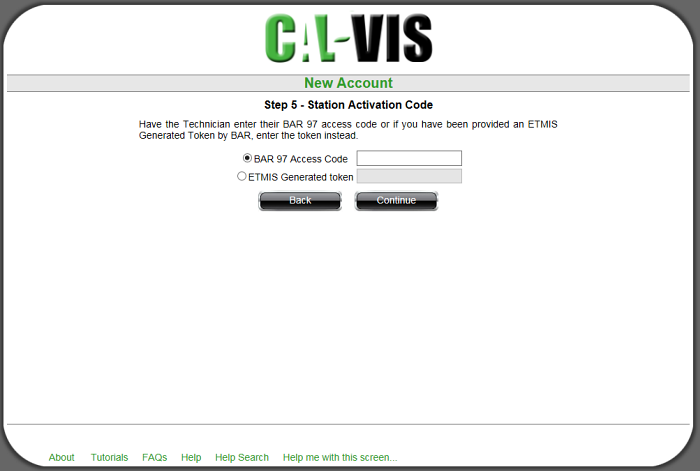
- Step 5 - Station Activation Code: Select one of the following and then click Continue to proceed:
- BAR-97 Access Code and then enter the Inspector or Repair Technician code.
- ETMIS Generated Token and then enter the token.
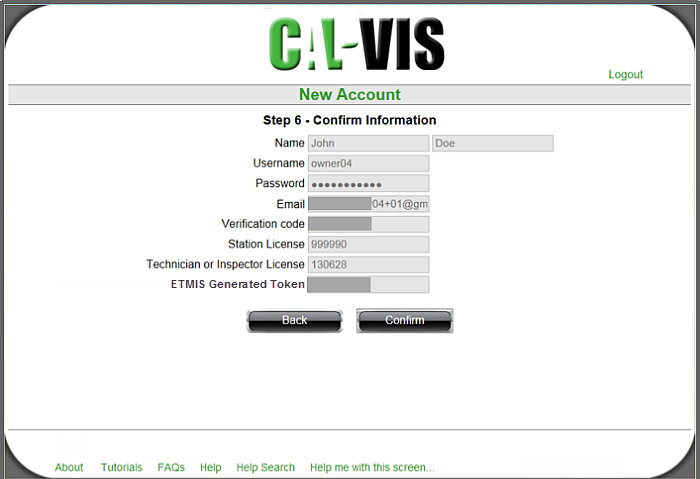
- Step 6 - Confirm Information: Review the displayed account information. Click Back to display and revise previous
screen(s) or click Confirm if the information is correct.
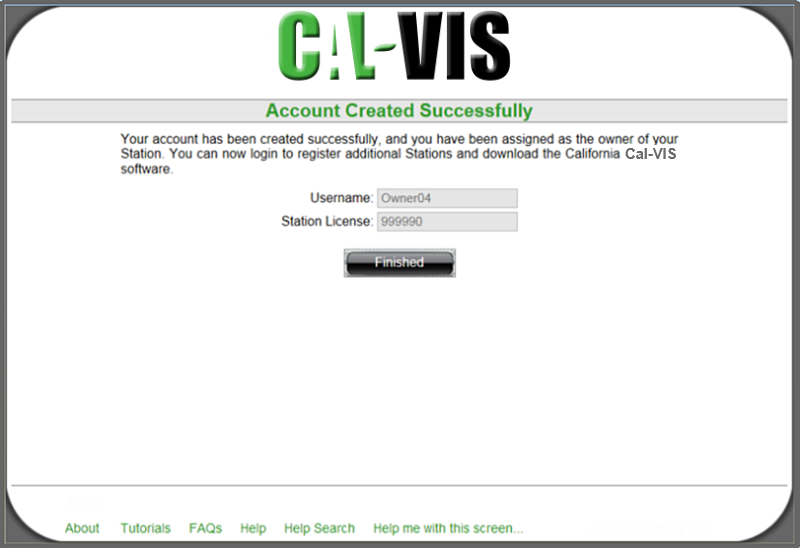
- Account Created Successfully: This screen notifies that the account creation successfully completed. Click
Finished to return to the Registration and Download Home.
Back to Top
Registering as a Technician Station Owner
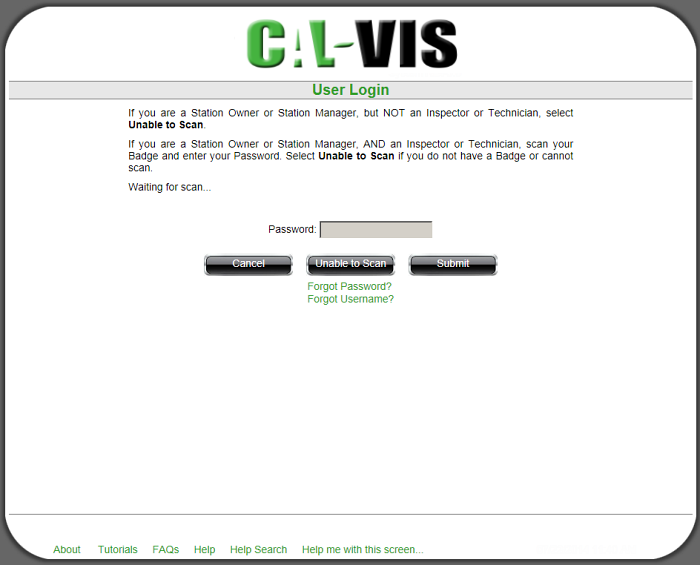
- User Login: If you are a Station Owner or Station Manager but NOT an Inspector or Technician, select and proceed to Unable to Scan.
If you are a Station Owner or Station Manager AND an Inspector or Technician, scan your Badge, enter your Password, and then select Submit to proceed. Select Unable to Scan if you do not have a Badge or cannot scan. .
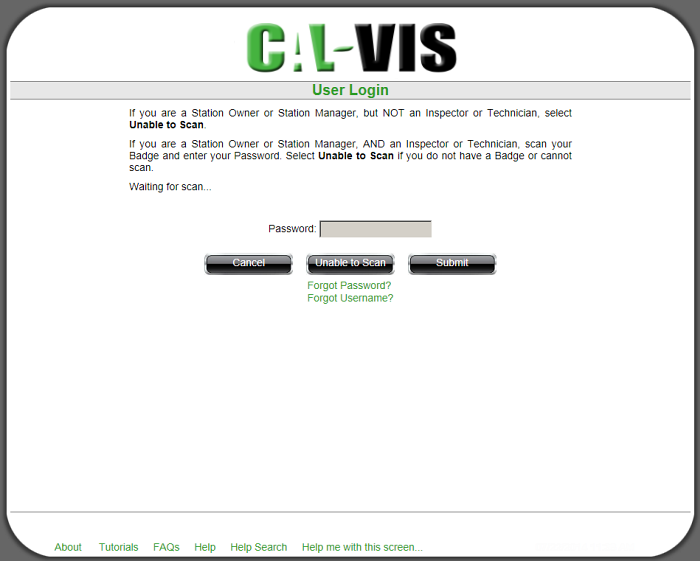
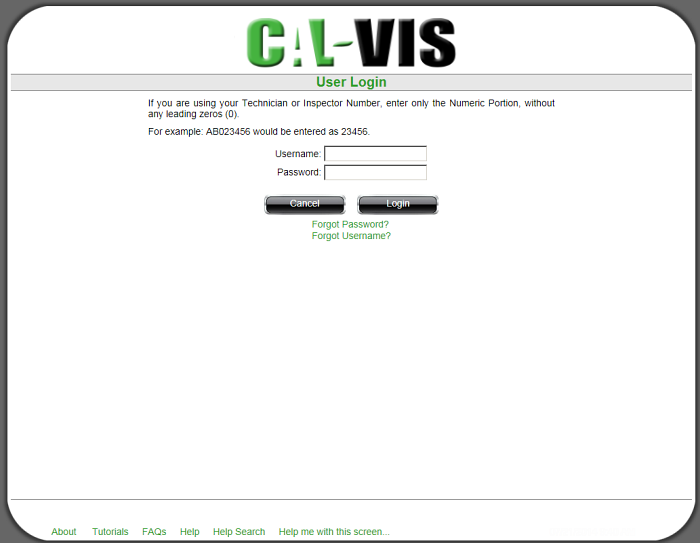
If you are Unable to Scan, follow the screen instructions to enter your Username and Password, and then click Login.
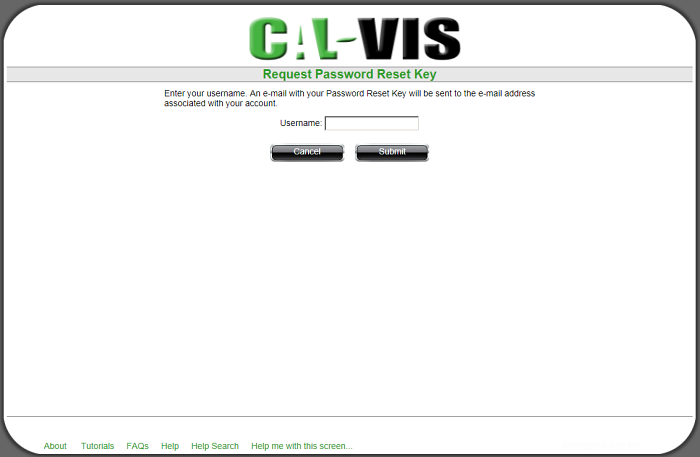
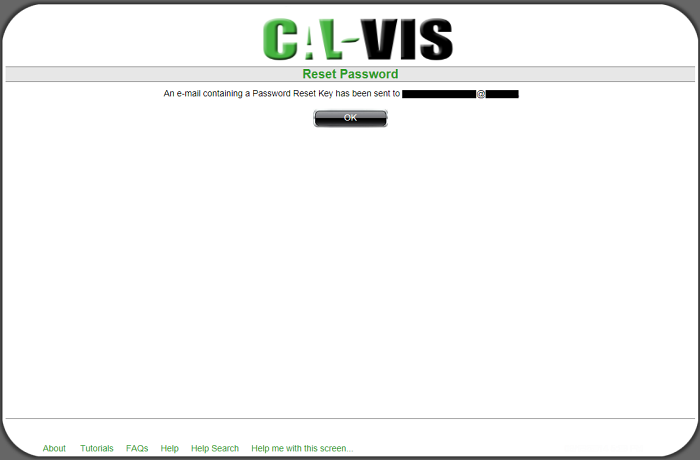
The resulting Reset Password screen informs that An e-mail containing a Password Reset Key has been sent to the e-mail address associated with the Username.
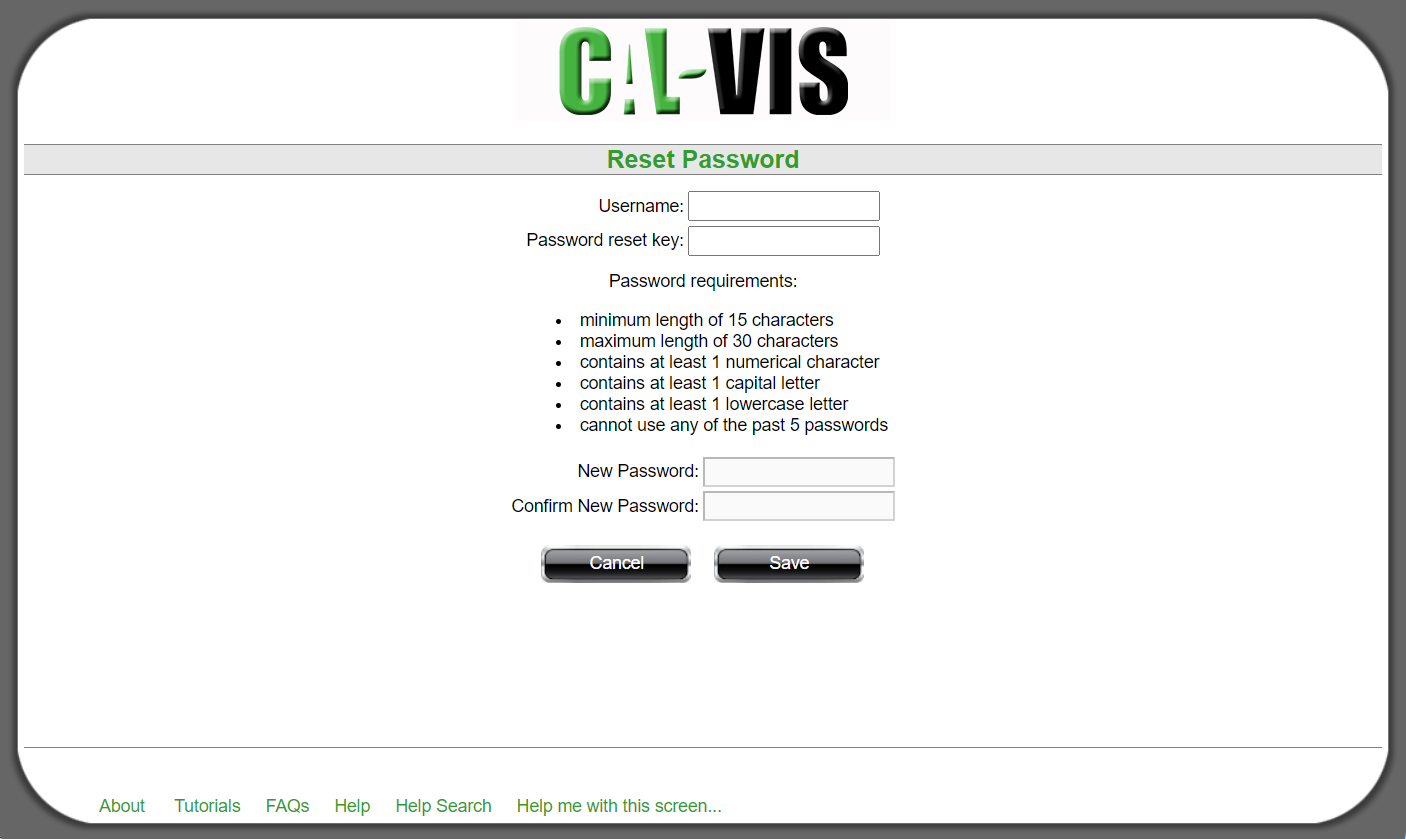
On the next Reset Password screen, enter your Username and the Password Reset Key from the received e-mail. Enter a New Password per the stated guidelines and then Confirm the New Password.
The resulting Reset Password screen notifies that Your Password has successfully been updated.
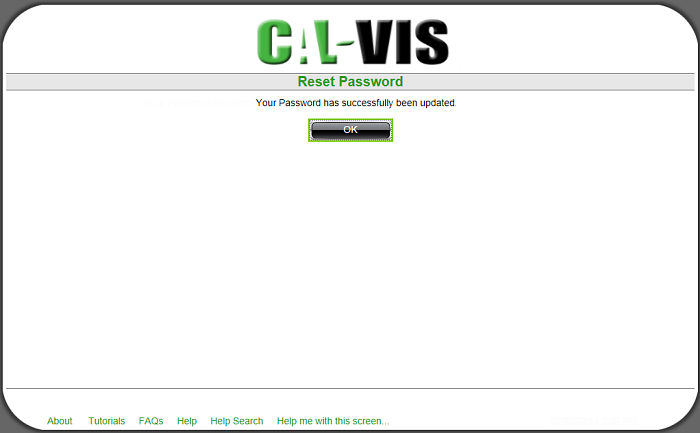
Select OK to return to the Registration and Download Home.
The next screen informs that An e-mail with your account information has been sent to your e-mail address.
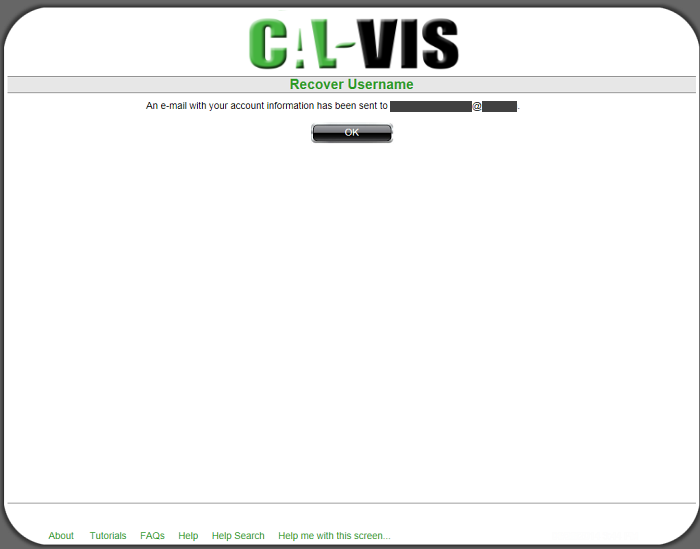
Click OK to redisplay the User Login screen.
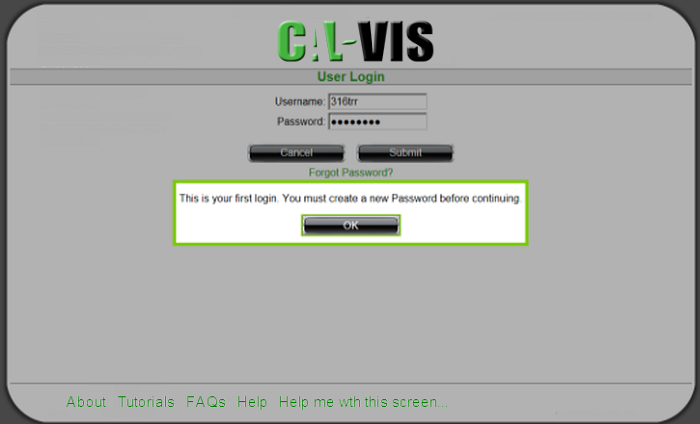
- User Login - Create New Password: Upon first login, click OK to follow the prompt to create a new password that
conforms to the displayed password guidelines on the next screen.
- Change Password: Enter your Username and current/new password information/confirmation. Click Save to proceed.
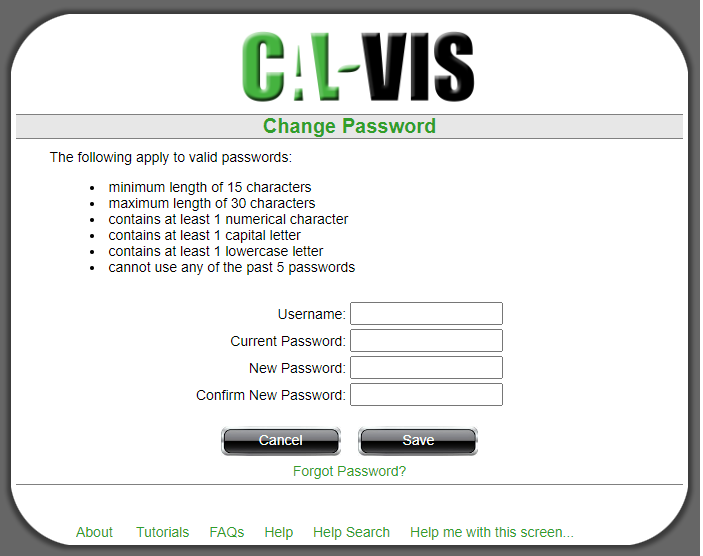
If you are Unable to Scan, enter your Username and current/new password information/confirmation. Click Save
to proceed or click Scan Badge to redisplay the previous screen and retry the scan.
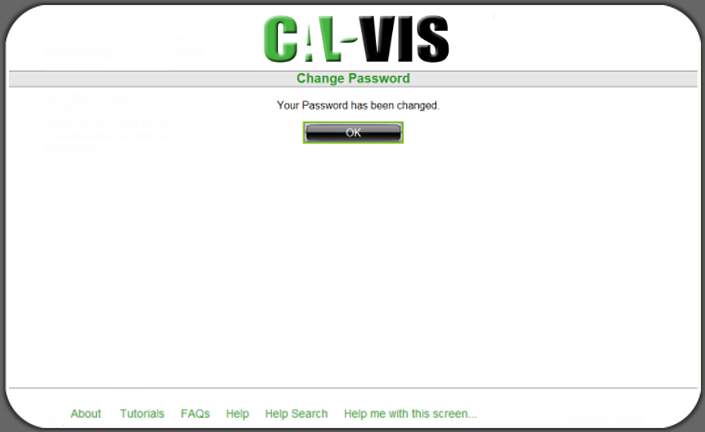
- Change Password confirmation is displayed. Click OK to proceed.
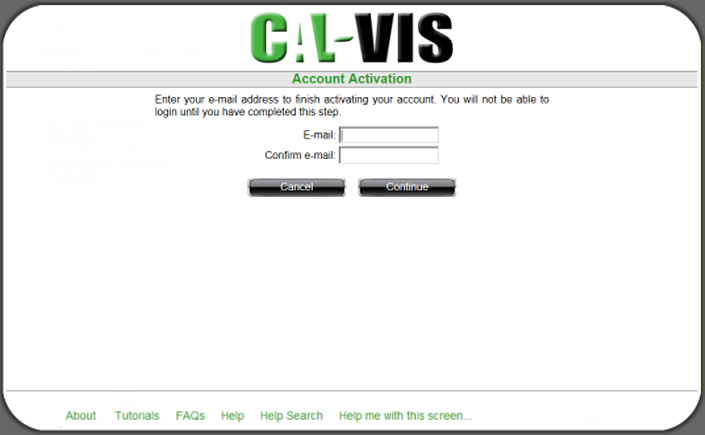
- Account Activation: Enter and confirm your E-mail address. Click Continue to proceed.
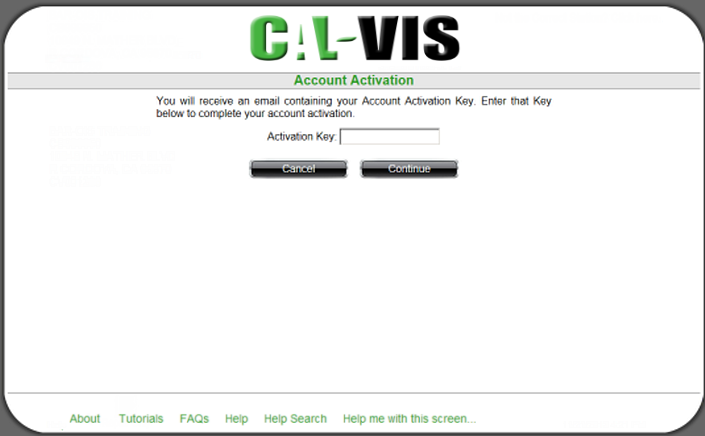
- Account Activation: BAR will respond with an E-mail containing an Activation Key. Enter the key and then
click Continue.
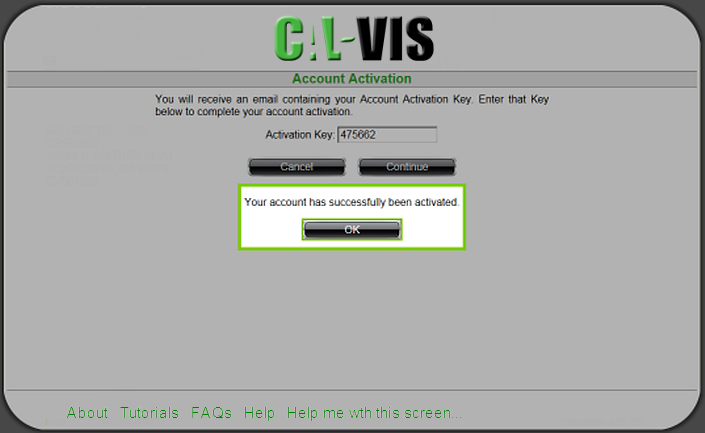
- Click OK to acknowledge that Your account has been successfully activated and to display the
Registration and Download Home.
- Proceed to the steps for Registering an Additional Station.
Back to Top
Registering an Additional Station
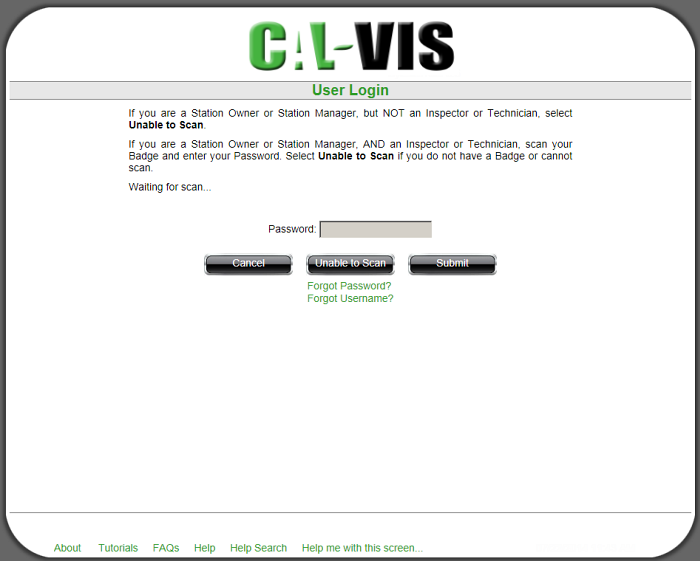
- User Login: If you are a Station Owner or Station Manager but NOT an Inspector or Technician, select and proceed to Unable to Scan.
If you are a Station Owner or Station Manager AND an Inspector or Technician, scan your Badge, enter your Password, and then select Submit to proceed to the Register Station screen. Select Unable to Scan if you do not have a Badge or cannot scan.
If you are Unable to Scan, follow the screen instructions to enter your Username and Password, and then click Login.
- Step 1 - Scan the Station License: Scan the Station's wall license. Click Continue to proceed.

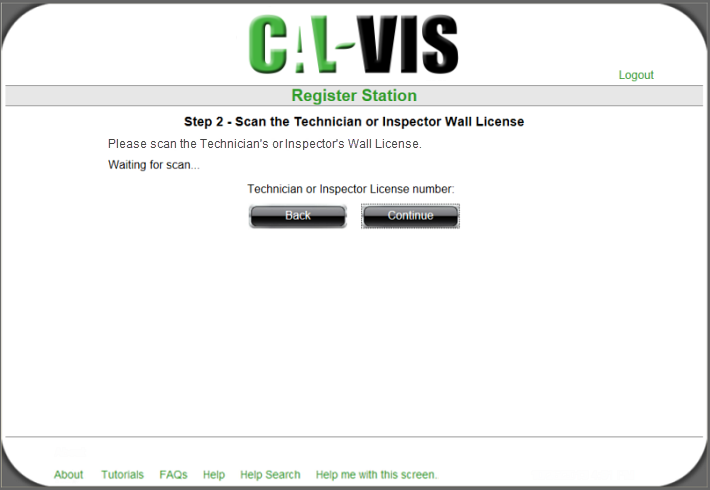
- Step 2 - Scan the Technician or Inspector Wall License: Scan the Repair Technician or Inspector wall license.
Click Continue to proceed.
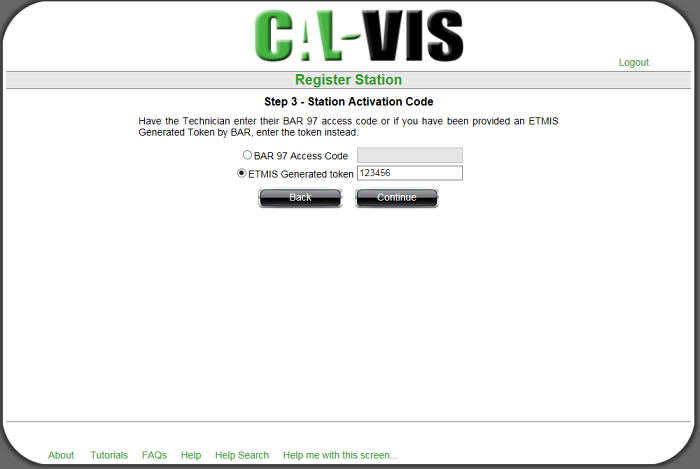
- Step 3 - Station Activation Code:Select one of the following and then click Continue to proceed:
- BAR-97 Access Code and then enter the Inspector or Repair Technician code.
- ETMIS Generated Token and then enter the token.
- Step 4 - Confirm Entries: Review the displayed information. Click Back to display and revise previous
screen(s) or click Confirm if the information is correct.

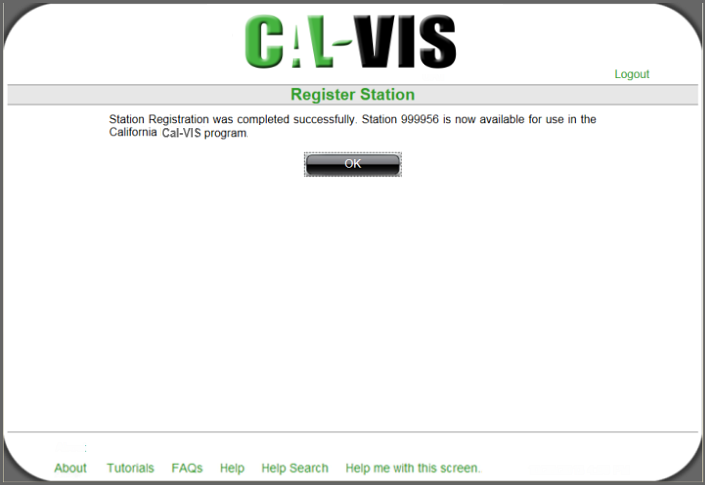
- The next screen displays that Station Registration was completed successfully and informs that the registered Station is
available for use. Click OK to display the Registration and Download Home.
Back to Top
Downloading the Cal-VIS Software
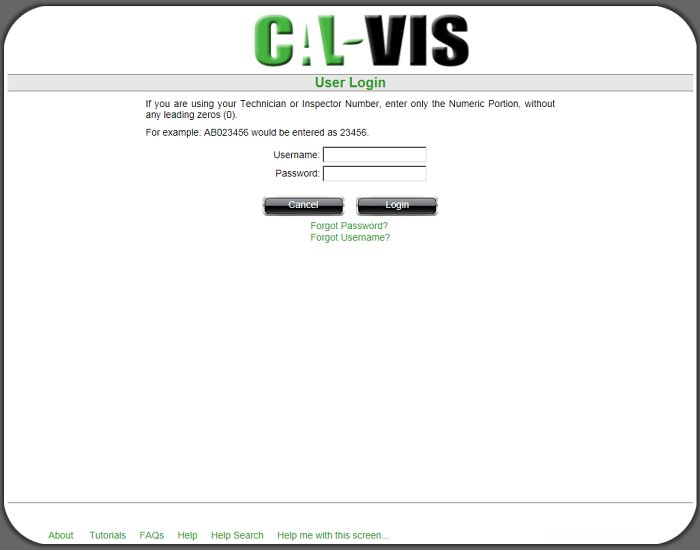
- User Login: If you are a Station Owner or Station Manager but NOT an Inspector or Technician, select and proceed to Unable to Scan.
If you are a Station Owner or Station Manager AND an Inspector or Technician, scan your Badge, enter your Password, and then select Submit to proceed to the Download Client screen. Select Unable to Scan if you do not have a Badge or cannot scan.
- Download Client: Per screen instructions, select the download destination Station Number from the drop-down and
then click Download.
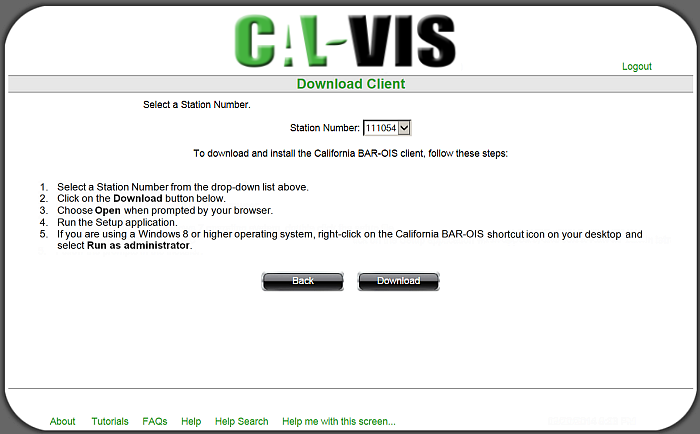
Select the appropriate option to Open or Save the downloaded file.
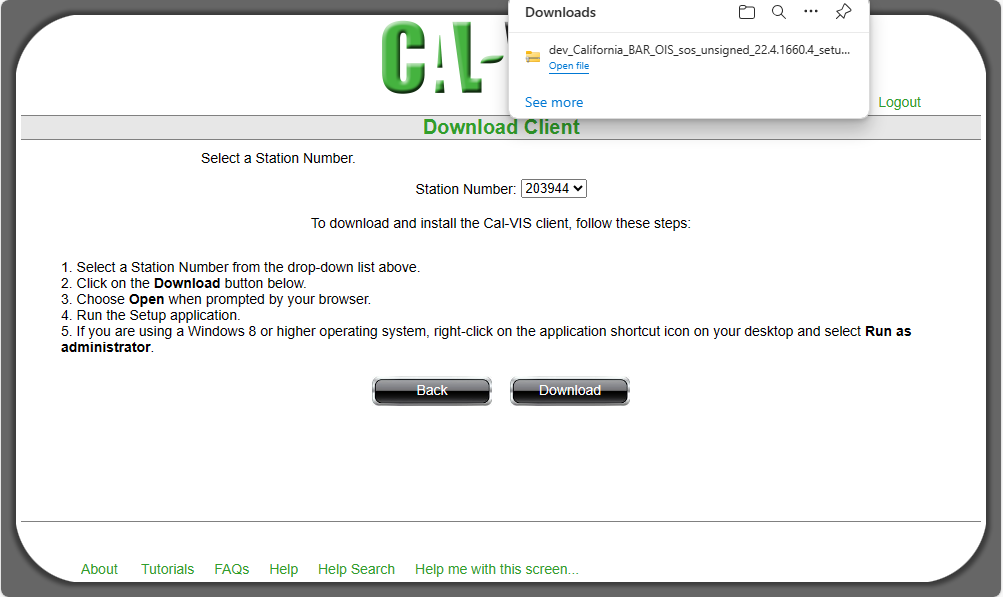
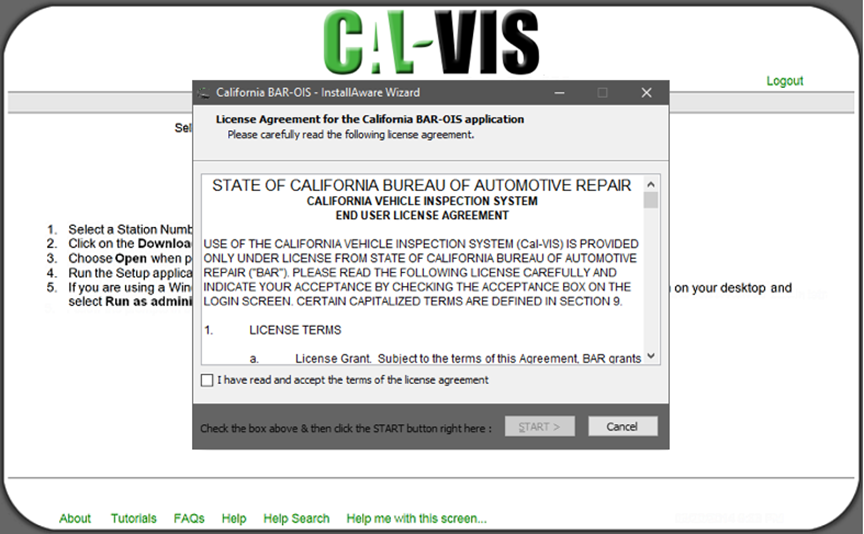
- Initiate the installation per the instructions on the preceding screen.
After scrolling down and reading and agreeing to the license agreement text,
Click on the box next to "I have read and accept the terms of the license agreement" and then click on the
gray "START>" button.
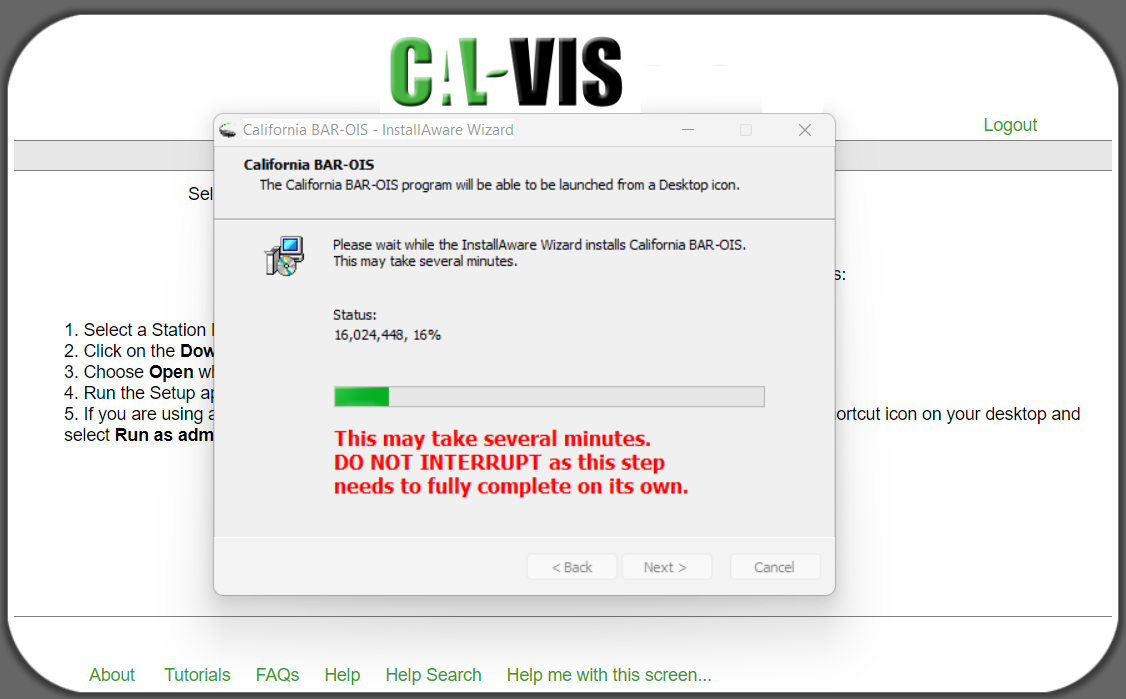
- Software installation progress is displayed. Do not interrupt the installation. It will take several minutes to
finish. Please wait for the Completed screen and do not close the Installing window.
- A Completion message is displayed after installation.
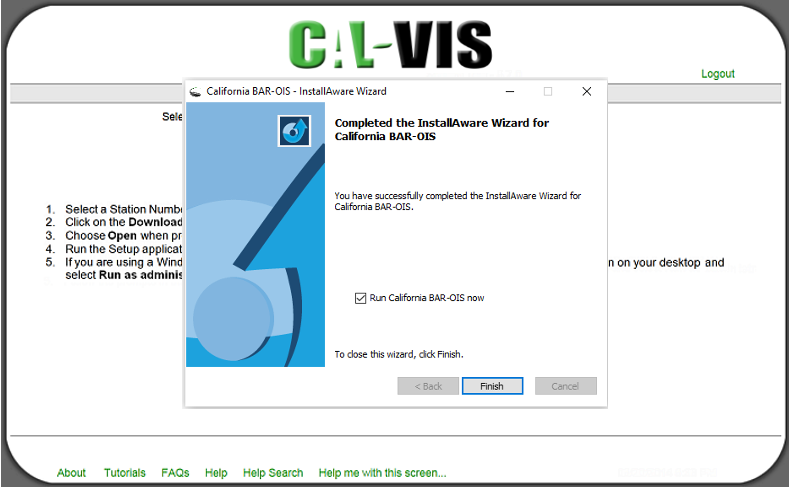
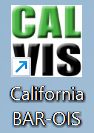
- If this is an initial installation, the application shortcut is added to the desktop.
- Click on the box next to the "Run California BAR-OIS now" text if you would like to launch the
application after finishing the installation. The box will be automatically checked by default and can be
toggled off by clicking on the box if you do not want to launch the application at this time. Click the gray
"Finish" button to close the installation wizard and/or proceed to Configuring Cal-VIS Software.
- Click HERE for further assistance.
Should you still have difficulties please call for assistance like you would normally do for other issues.
Back to Top

